
Oven Baked Chicken Leg Quarters
If you’re searching for a delicious dinner idea, Oven Baked Chicken Leg Quarters are a fantastic choice. These affordable, flavorful cuts deliver restaurant-quality results right in your home kitchen. With the right technique and a perfect blend of seasonings featuring smoky paprika, you’ll create a meal that’s both budget-friendly and absolutely delicious.
Why Choose Chicken Leg Quarters?
Chicken leg quarters are the unsung heroes of the poultry world. Combining the drumstick and thigh, these cuts offer rich, dark meat that stays incredibly moist during cooking. Unlike lean breast meat that can easily dry out, dark meat contains natural fats and connective tissues that break down during cooking, resulting in tender, juicy chicken that’s nearly impossible to overcook.
The affordability factor makes chicken quarters particularly appealing for families. You can often find them for under $1 per pound, making this one of the most economical protein options available. Despite their low cost, they deliver maximum flavor and satisfaction.
The Perfect Seasoning Blend
Paprika – The star ingredient that provides both beautiful color and subtle smoky flavor
Salt – Essential for enhancing natural flavors and creating crispy skin
Black pepper – Adds a gentle heat and complexity
Garlic powder – Contributes savory depth without overpowering
Onion powder – Rounds out the flavor profile with subtle sweetness
This combination creates a harmonious balance that complements the rich taste of dark meat without masking its natural deliciousness.
Step-by-Step Preparation Method
- Preparation is Key
Start by patting your chicken quarters completely dry with paper towels. This crucial step removes excess moisture that can prevent proper browning and crispy skin development. Moisture is the enemy of crispy chicken skin, so don’t skip this step. - Oil Application
Generously coat each piece with olive oil, ensuring every surface is covered. The oil serves multiple purposes: it helps seasonings adhere to the meat, promotes even browning, and contributes to that coveted crispy exterior we’re after. - Seasoning Magic
Apply your seasoning blend generously, making sure to work the spices under the skin where possible. The paprika not only adds flavor but creates that gorgeous golden-red color that makes your baked chicken quarters in the oven visually stunning.
The Perfect Baking Technique
Preheat your oven to 425°F (220°C). This higher temperature is crucial for achieving crispy skin while ensuring the meat cooks through properly. Place your seasoned chicken quarters on a rimmed baking sheet, skin-side up, ensuring pieces don’t touch each other.
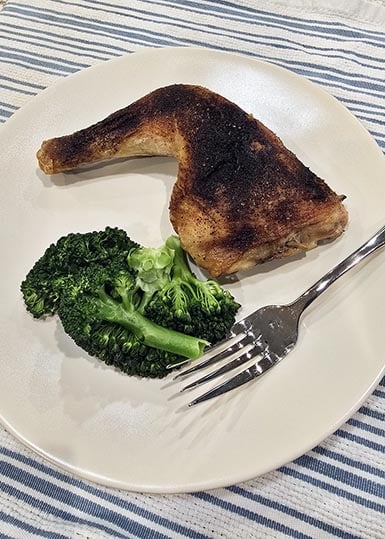
Bake for 35-45 minutes, depending on the size of your quarters. The internal temperature should reach 195°F (90°C) when measured at the thickest part of the thigh. The skin should be golden brown and crispy, while the meat should be tender and juicy.
The Resting Period: Don’t Skip This Step!
After removing your baked chicken from the oven, resist the temptation to cut into it immediately. Let the chicken rest for 10 minutes. This resting period allows the juices to redistribute throughout the meat, ensuring every bite is succulent and flavorful. Cover loosely with foil to keep warm while resting.
Perfect Serving Suggestions
Baked chicken quarters in the oven pair beautifully with numerous side dishes. Steamed broccoli provides a healthy, colorful contrast that balances the rich meat. The bright green vegetable adds nutritional value and textural variety to your plate.
Roasted root vegetables make another excellent accompaniment. Try carrots, potatoes, parsnips, or sweet potatoes seasoned with similar herbs and roasted alongside your chicken. The vegetables absorb the delicious drippings, creating a complete one-pan meal.
For a lighter option, consider a fresh garden salad or roasted asparagus. The crisp, fresh flavors provide a nice counterpoint to the rich, savory chicken.
Tips for Success
Always use a meat thermometer to ensure proper doneness
For extra crispy skin, place quarters on a wire rack set over the baking sheet


Other Recipes from the Blog
If you enjoyed this recipe let us know by leaving a comments below. We’d love to hear from you!